JamPlay and TrueFire Merge Their Video Lesson Libraries To Form Industry’s Most Comprehensive Guitar Learning Platform
Union of the two leading fretted instrument platforms delivers unrivaled value, convenience, and variety to students of both brands
JamPlay and TrueFire subscribers now have unlimited access to 70,000+ lessons, 400+ instructors, advanced learning tools, and desktop, mobile and OTT apps as part of their membership – at no additional cost!
PETERSBURG, FL – July 11, 2023: TrueFire Studios’ sister brands JamPlay and TrueFire are proud to announce the merger of their respective content libraries to form the industry’s most comprehensive fretted instrument lesson resource. This move provides their respective student bodies with an unrivaled faculty of GRAMMY award-winning educators and advanced learning tools.
With more than two decades of combined experience and millions of registered users, the combined content libraries of JamPlay and TrueFire offer students the world’s broadest range of fretted instrument lessons across all levels, genres, and techniques.
“Uniting our two libraries gives students access to over 70,000 interactive video lessons with tab, notation, jam tracks and our full suite of learning tools including video-sync, slo-mo and looping,“ said Brad Wendkos, TrueFire’s founder and Head of Content for TrueFire Studios. “The resulting union also connects music learners with an unparalleled opportunity to learn from over 400 Grammy-winning artists, top session players, and world-class educators.”
“This merger creates a true powerhouse in the world of online music education, delivering exceptional value, convenience, and an unrivaled depth of content for JamPlay and TrueFire students alike,” noted Owen Grover, CEO of TrueFire Studios.
The new platform will operate under the TrueFire brand at TrueFire.com, with JamPlay instructors joining the TrueFire faculty to create the industry’s most comprehensive roster of guitar learning expertise. Best of all, both JamPlay and TrueFire students will gain immediate access to these expanded features, content, and services at no additional cost.
###
About TrueFire Studios
TrueFire Studios’ family of brands, websites and social networks include TrueFire, ArtistWorks, JamPlay and FaderPro. Over 3 million music students, pro musicians and fans, from virtually every country in the world, “Practice Smart and Play Hard” with TrueFire Studios’ massive library of interactive video music lessons, patented learning systems and all-star faculty of artists & educators.
TrueFire.com | ArtistWorks.com | JamPlay.com | FaderPro.com
Get the Sound of a Legend: Jimi Hendrix
JP BLOG
Share this
Contributed by: Mason Keyser
The Pantheon of Blues Gods is a crowded place, full of great names and awe-inspiring musicians. It would be impossible to cover them all adequately, but Jamplay has selected a handful that each offer a little something different to the new guitarist or someone returning to the instrument. First we’ll be covering Duane Allman, Eric Clapton, and Jimi Hendrix — three great guitarists who have inspired millions of people to pick up the six string. Whether you just bought your first guitar, or you just dusted off the acoustic sitting in your closet, you’ll find something worth learning from these three legendary players.
Let’s talk Jimi Hendrix.
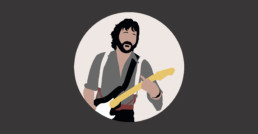
No other musician had more of an influence on the path of the electric guitar in the 20th century than Jimi Hendrix. His legacy is unmatched, especially when you consider how he spent only about ten years of his short life as a performing musician. Nevertheless, Jimi has been an influence on just about every guitarist born since 1955, and we have all tried to channel his sound and his style at one time or another. It is only fitting then, that we try to do so again right here.
Guitars
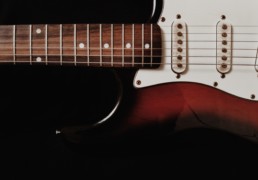
Jimi is one of those few guitarists where, if you want to replicate his sound, the guitar really matters. He was known for his flipped ’68 Stratocaster, but you don’t have to bust your 401k to get the sound of that guitar. Because Hendrix was so inspiring and popular among generations of guitarists over the past fifty years, Fender has produced “Jimi” style Stratocasters in virtually every price range of their production. If you can’t get a strat, just aim for a guitar with single coil pickups and a long scale neck. You want the brightness and tonal elasticity that comes with those two features.
Amps
Just like our friend Eric Clapton, Jimi used a cranked 100 watt Marshall head with 4×12 cabinets, but I’m willing to bet you can’t play Woodstock level volume. Thankfully, amp companies have developed attenuators so you can get a roaring Marshall tone without ending a marriage or needing to schedule an appointment for hearing aids.
Alternatively, you can use digital amp emulators with a “crunch” or “British” setting to build the canvas for your tone. Most modern “solid state” amps feature a wide array of amp emulators, so you should have no trouble finding the necessary amp sound for a good price.
Pedals
Here’s where you want to spend your money. Jimi liked his effects. He made sure his pedals got played. Jimi favored the temperamental Fuzz Face, Octavian fuzz, Uni Vibe tone, tape delay, and Vox wah pedal. Dunlop released the Jimi Hendrix “’69 Psych Series” micro pedals in 2019 which do a good job of attaining his tone without taking up a whole lot of space on your pedalboard. But if you’re looking for the bare minimum, prioritize the fuzz pedal and wah pedal.
Approach
It’s hard to play like Jimi and not feel like an impostor. I’d advise against spending too much time replicating his stage antics and his fashion sense, both of which were extraordinary, and probably very costly. Do not set fire to your guitar. Do not wear platform heels. Instead, focus on trying to further what Jimi did. And what did Jimi do?”
Jimi blew your mind.
Jimi shocked and amazed just about every audience he got his hands on.
But here’s the thing, if you try to go up on stage and play like Jimi, you’re going to sound great, you’re going to feel great, but you’ll never go where Jimi went. Because Jimi Hendrix broke new ground, and he didn’t do that by playing like everyone else that went before him.
So you gotta try something different. That might sound hard at first, very hard in fact, but if you can learn to look at your guitar and think not of what you’ve already played, but what you might play next, you’ll get it. When you’re soloing in a pentatonic scale, try to deconstruct all the little licks and riffs you know by heart and recombine them into some Frankenstein’s monster. Remember, as long as you’re in time and in key, you won’t sound bad!
Technique
Most of what Jimi played is well within the physical range of most people. To match his playing ability is a question of dexterity and finesse which, through a few months of practice, you can definitely attain.
In JamPlay’s skill of the week video lesson, focused on fret hand strength, you’ve got a step-by-step guide to get you started.
What will require a bit more personal practice is a mastery of your wah pedal and your effects.
Normally I shy away from spending too much time on pedals. Too easily they serve more as a distraction than an aid to the music. In Jimi’s case, they are fundamental building blocks of his sound. So, you want your foot working that wah pedal to be as dextrous and natural as your fingers when you play. You want your fuzz tone to be on point, and your amp and guitar tone to blend in such a way makes the hairs on your neck stand up when you hear yourself play.
Jimi Hendrix was an unparalleled performer, but don’t let that stop you from trying to walk further down the path he created for the guitarists that have come after his death.
You can’t play just like Jimi, but you can play in the style and the same zone, and that’s what it really means to sound like your idol.
JamPlay is home to more than 500,000 guitarists with guitar lessons from world class instructor artists in every genre and for every interest to power up your guitar skill. Join at JamPlay.com.
Related Posts
Comments
Get the Sound of a Legend: Eric Clapton
JP BLOG
Share this
Contributed by: Mason Keyser
The Pantheon of Blues Gods is a crowded place, full of great names and awe-inspiring musicians. It would be impossible to cover them all adequately, but Jamplay has selected a handful that each offer a little something different to the new guitarist or someone returning to the instrument. First we’ll be covering Duane Allman, Eric Clapton, and Jimi Hendrix — three great guitarists who have inspired millions of people to pick up the six string. Whether you just bought your first guitar, or you just dusted off the acoustic sitting in your closet, you’ll find something worth learning from these three legendary players.
Let’s talk about guitar legend, Eric Clapton.
Eric Clapton is one of my favorite guitarists because so much of his tone comes just from his hands. There’s not much that gets between Clapton and the music. His guitar speaks for itself, with as little effects as possible. Though Clapton had the nickname “Slow Hands” in the studio, due to his low key “every man” solos, he always communicated what the song needed to say in a way that has captivated guitarists for generations.
Guitars
Clapton has probably played hundreds of different guitars over the course of his long career, but when I think of his music, I think of a Martin 000-28 for acoustic, and a Fender Stratocaster or Gibson ES 335 for electric. Clapton has a clear, mid-heavy tone with just enough distortion to maintain a nice, bristly undercurrent for his signature sound.
If you’re not willing to buy the same guitars he’s using (understandably so), just make sure your guitar’s volume knob(s) are turned all the way up to better access the grit, and target your tone to be mid-focused (i.e. roll down your treble and bass knobs a good bit). Take advantage of all the pickups you have at hand (don’t just play in the bridge position) and change your strings out once every month or so!
Amps
Eric Clapton changed his amps for just about every album and every tour. In the late Sixties he was known to use an eardrum shattering 100-watt Marshall head with two full stack 4×12 cabinets. If you don’t know what that means, it means tinnitus and a broken back. Such a rig is not feasible unless you have a home studio and no neighbors or you’re a touring musician playing big rooms and stadiums. Nevertheless, Marshall is the way to go when reaching for Clapton’s sound.
If you can get your hands on any Marshall amp, big or small, or any amp similar to a Marshall, dial off the treble on your EQ settings and really boost your mid and bass frequencies. If you’re using a guitar with single coils (basically any Fender style guitar) the natural brightness of your guitar should work well with that amp EQ setting. If you’re using a guitar with humbuckers (basically any Gibson style guitar) you might want to adjust the amp to be a bit brighter. You’ll want most of your overdrive/distortion to come from your amp, so you gotta play loud, but please, for the love of your hearing, use earplugs.
Pedals
Clapton came of age in a time before the widespread availability of different effects pedals that we enjoy today. That’s not to say, however, that he didn’t take advantage of the newest pedals as soon as they came out. Clapton used his fair share of wah pedals, but the wah tone I most associate with him is a Vox V846, mainly because of the throaty nature of that wah.
He has used a variety of pedal effects for different tours and studio sessions but here are the sounds we know he’s used consistently: hard clipping distortion, tone bender style fuzz, chorus, tremolo, and mono delay.
Approach
Compared to most of the other guitarists covered in this series, Clapton sticks close to the Blues tradition. His licks are influenced by all the Kings, Robert Johnson, and probably just about any blues guitarist he heard on the radio as a kid. If you want to play like Clapton, learn to play like the Blues greats of the 30’s-50’s as well.
JamPlay has a great lesson on Robert Johnson to get you started down your blues path.
Now, if you’re trying to emulate Clapton, you gotta remember that when people go to see him, they go to see him. He is the focal point of the performance. Make sure you’re also comfortable being the focal point and make sure the music you’re bringing to the table is good enough to stand on its own.
Technique
They don’t call him Slow Hands for nothing. Much in the same vein as Duane Allman, Clapton keeps his cool while he plays. You want to focus on keeping your hands relaxed both while you’re soloing and while you’re playing rhythm. Make sure every note, every slide, every bend, every hammer-on is deliberate and precise.
If you’re trying to play like Clapton you don’t have to play a mile a minute, in fact you shouldn’t! Give yourself time to think a bar or two ahead of what you’re playing and just keep it smooth and sweet and bluesy. Lastly, if you’re lucky enough to be in a band like Cream, make sure your energy matches the rest of your bandmates. Be the focal point, but not the only point, of the music.
JamPlay is home to more than 500,000 guitarists with guitar lessons from world class instructor artists in every genre and for every interest to power up your guitar skill. Join at JamPlay.com.
Related Posts
Comments
Get the Sound of a Legend: Duane Allman
JP BLOG
Share this
Contributed by: Mason Keyser
The Pantheon of Blues Gods is a crowded place, full of great names and awe-inspiring musicians. It would be impossible to cover them all adequately, but Jamplay has selected a handful that each offer a little something different to the new guitarist or someone returning to the instrument. First we’ll be covering Duane Allman, Eric Clapton, and Jimi Hendrix — three great guitarists who have inspired millions of people to pick up the six string. Whether you just bought your first guitar, or you just dusted off the acoustic sitting in your closet, you’ll find something worth learning from these three legendary players.
Of all the great blues guitarists, Duane Allman might be the most unique. His use of a slide and his mastery of guitar and amp tones continue to inspire guitarists today. If you’re a new guitarist or someone returning to the instrument, Duane is a great musician to emulate because he requires a bare minimum of gear to get his sound. Let’s get into what that bare minimum includes and go over the real key to Duane’s sound: the approach and the technique.
Duane Allman
Guitars
Duane was famous for using a variety of Les Pauls (‘57 Gold Top, ‘59 Cherry Burst, etc.) but you don’t need to spend thousands of dollars for the right guitar. Focus on finding a guitar with a short scale neck and humbucker pickups. Basically you’re looking for a fuzzy, warm tone that will sound great when played at high volume. If your current guitar doesn’t have those two features, don’t worry. Dial the treble off your tone and really push your bass frequencies up without becoming muddy. Aim for warmth in your guitar tone.
Amps
Duane Allman played many different amps throughout his life and he played them all loud. If you’re wanting to really replicate that overdriven sound of his, you should invest in a tube amp. Tube amps sound amazing when they break up, but that means you need to play loud. A good rule of thumb here is the higher the wattage of the amp, the louder you’re going to have to crank that volume knob to get the tone you want.
Tube amps are definitely more expensive (and heavier) than solid state amps, but if your back and your bank can afford it, go for it. Duane used Fender amps for the initial stages of his career before moving off into Marshall. Either amp line will serve you well, so long as you get a tube amp.
Pedals
Duane Allman’s pedal arsenal was puny compared to what most modern guitarists use today. You really want to rely on your amp to get the overdriven tone that Duane is famous for. But if you’re dead set on pedals, then just about any overdrive or boost pedal should work for you and make breaking that amp up a little easier.
Approach
Be calm, be cool, be collected. Duane Allman played like ice, watch any live footage and you’ll see what I mean. He was not a theatrical musician, he just focused on the music and on his hands. Even at the peak of a solo the most he did was sway along with the music. Duane was playing with two drummers, another guitarist, a bassist, and keys. There was already a lot going on, and the possibility of muddying up the sound was real and present. He gave all that was required for the Allman sound, and no more.
Technique
When you’re trying to evoke Duane Allman in your solos, the number one word to remember is consistency. Make sure your licks tie together in a meaningful, melodic way. Intersperse your playing with some soulful sustained notes and think rhythmically and repetitively when you’re improvising.
Duane Allman is a difficult player to emulate if you’re not comfortable using a slide.
Jamplay offers a new, free course that is a great introduction to using a slide in the Duane Allman style, but a slide is not necessary to sound like Duane Allman. What is necessary, or at least highly recommended, are a few key pieces of gear and a whole lot of attention to approach and technique.
If you want more information about how to dial in your tone with what you already have, check out Jamplay’s lesson on gear and tone and see how they work together.
JamPlay is home to more than 500,000 guitarists with guitar lessons from world class instructor artists in every genre and for every interest to power up your guitar skill. Join at JamPlay.com.
Related Posts
Comments
A Guide to Recording Acoustic Guitar
JP BLOG
Share this
Contributed by: J. Bridenstine
Recording the unique warmth of an acoustic guitar can be challenging, especially if you are DIYing it at home. Sometimes the depth of sound doesn’t translate. But recording rookies may not realize that all it takes is a few extra steps to create the perfect acoustic session. If you are struggling to record your acoustic guitar playing, then these tips are a good place to start.
Set Up the Right Space
Where you record matters. Even the most cutting-edge equipment will do little in a poor location. The best rooms to record in are those with plenty of hard surfaces and few furnishings. This is why bathrooms, stairwells, and cavernous venues have great acoustics. Bathroom acoustics are particularly great because of the ceramic in the walls. You want the sound to bounce off the right places and be absorbed accordingly. However, this doesn’t mean that other spaces won’t do.
If recording at home, find a space that works by testing different areas. Do a few guitar exercises and gauge how they sound. Sometimes, even just a few feet will make a difference. Getting the acoustics right is important, as you don’t want it to be too echo-y or picking up any background noise.
Setting up acoustic treatment is also fundamental. This prevents sound from bleeding out and controls excessive reverb. If you don’t have the right space for it, set up foam or acoustic panels to help direct the sound and better allow you to capture it, which is ideal for soft instruments like an acoustic guitar.
Explore how to set up your home space with JamPlay’s free Setting the Scene video lesson from the 2021 Guitarist Toolkit: Recording Guitar at Home. Join JamPlay.com to get access to all of our Guitarist Toolkits on every topic you need to max your guitar play.
Set your home recording scene
Invest in Input Tools
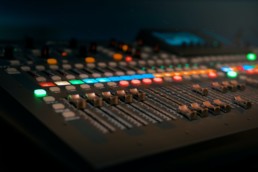
To do justice to your guitar playing, consider the audio interface, cables, sound cards, and microphone. This will affect the quality of how the sound is received. If it’s not set up right, a poor audio connection can affect an otherwise great recording.
It may also help you to invest in a solid pair of headphones so you can really hear the tone that is coming through, and adjust your tuning accordingly. You’ll also want to consider the best mjc for vocals if you want to record your voice while you’re playing, and one you should certainly consider is a condenser mic.
Condenser microphones have a much clearer cardioid pick-up than dynamic microphones. It produces a brighter sound that is more accurate. You can even switch up patterns for any dynamic sound you want to 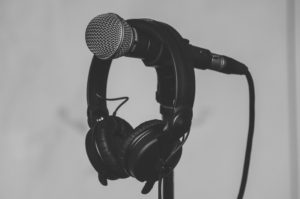 produce. If you decide to layer vocals later, these mics will be capable of doing so.
Also determine your ideal pick-up pattern. If you’re just standing still, unidirectional will do. But if you want more mobility or you’re using multiple instruments, consider omnidirectional.
Remember that if you use a condenser mic, you need a phantom power supply. If you don’t have a soundboard, you can connect it to your PC with an XLR cable.
Prep Your Audio Workstation
Technically, you can just connect directly to your computer and record. But you want the right hardware and software combination to really produce a professional acoustic guitar recording.
Get a decent DAW (Digital Audio Workstation). You don’t need to shell out for an expensive professional studio offering. But you want to get a good DAW since you’ll be mastering your final music piece. This ensures that you produce tones that aren’t muddy, crackled, or distorted. There are many options depending on your proficiency and budget. Beginners can start with free user-friendly options like Audacity (for Windows) or Garageband (for Apple).
When all is said and done, the only thing left to do is jam. You can do a few test runs to get comfortable in your setup first. Don’t be too hard on yourself and remember that this is all trial and error. Every musician likes to record differently. Soon enough you’ll begin to develop an approach that is best for you. For more tips on how to produce that perfect acoustic sound check out our post on playing with more expression.
Watch the DAW Down-Low from our Demystifying the DAW video in the Singing and Studio Essentials 2021 Guitarist Toolkit.
JamPlay is home to more than 500,000 guitarists with guitar lessons from world class instructor artists in every genre and for every interest to power up your guitar skill. Join at JamPlay.com.
Related Posts
Comments
Staff Picks: May 2021
JP BLOG
Share this
Just a few favorite JamPlay courses, handpicked by our team!
Our staff members have a unique perspective on the many courses in the JamPlay catalog. Most of us are guitar players — so we have opinions, likes, dislikes, and favorites just like you do. Here are three Staff Picks that we think you’ll enjoy.
FROM ALEX:
I’ve known Tyler Grant for years. We’ve done a number of shows together throughout my career as a touring bassist, and I was always struck by Tyler’s immense versatility, virtuosic playing and incredible improvisational abilities. Tyler’s “Jamming in a Jam Band” course is informative, easy to follow, and most importantly — tons of fun.
If your influences on guitar include the likes of Jerry Garcia, Warren Haynes or Trey Anastasio, this is a must-watch. Tyler starts with the essential basics and carries you all the way through to being able to jam with the best. Definitely check it out!
FROM AARON:
Not everyone struggles with barre chords but for those who do, it’s really demotivating. We had quite a few members mentioning barre chords as a pain point so I reached out to Dave Isaacs to see about doing a course to help solve this problem. Dave, in my opinion, really hit it out of the park with 28 short lessons that gradually build the ability to play barre chords clearly and without “death grip”.
It’s been so rewarding to read the comments on the lessons and hear about the breakthroughs people are having. If you avoid barre chords or maybe you play them but tire out quickly, check this course out.
FROM CLAIRE:
The Power of 3 Notes combines painless music theory with practical exercises to help you play triads and more in different inversions up and down the neck (chords, arpeggios, colored chords, etc.).
Horace’s instruction is great! Clear, just the right pace, friendly — it just makes sense! I found that practicing the exercises has really opened up my fluidity so I don’t have to “think” so hard about what and where to play.
JamPlay is home to more than 500,000 guitarists with guitar lessons from world class instructor artists in every genre and for every interest to power up your guitar skill. Join at JamPlay.com.
Related Posts
Comments
Practicing Barre Chords Like a Pro
JP BLOG
Share this
Barre chords are hard to get the hang of. Even though you are a semi-experienced guitar player, who has been practicing for months, you will find that barre chords are a whole new can of worms. They take strong fingers/hands, laser precision, and extensive knowledge to master the skill.
If you have been practicing barre chords with no luck, don’t give up. Everything is challenging when you first learn it. It’s part of the fun, right? And I’m going to give you the tips and tricks to make sure conquering barre chords is as easy as possible.
Capos
Capos benefit by helping your understanding— which will help you with execution.
Think of a capo like your finger. An Em chord with a capo on the first fret is making an F sound. An Am shape with a capo on the second fret is really a Bm. In fact, many songs use capos to avoid playing barre chords. This may seem rudimentary but understanding this will have you well on your way. Explore this free video lesson to improve your use of capos.
Mindset
Let’s get one thing straight though, barre chords do take strong fingers. Merely doing finger/hand workouts is not going to help you play barre chords. For example, you have probably seen grip exercisers in music stores with the promise that they will significantly help you, but they won’t. The only way to practice barre chords is by playing them.
Muscle memory is so important when playing guitar. If you just work out your hands– while they may be stronger– you have really made no progress with barre chords. But playing them will increase both strength and muscle memory, so get there and stay. Don’t fall into the trap. Just because you can’t hold a barre chord now doesn’t mean that you need to start taking your hand to the gym. Just keep playing them and you will be nailing them in no time! Learn from this free video lesson, Barre Chords: The Mindset & The Principles of Success.
Technique
Now that we got the mindset out of the way, we can talk about the best way to execute a barre chord.
First tip: Don’t play a barre chord with a flat finger. The inside of your hand is soft and cushiony so it will take much longer to be able to play one. Instead, use the side of your finger. It’s much harder which cuts down the amount of strength you need to use.
Second tip: Use your strumming arm to push the guitar towards your body. This way your hand isn’t doing all the heavy lifting.
Third tip: Lower your thumb to the middle of the neck. Naturally, your thumb will be at the top of the guitar neck when playing basic chords (G, A, D, etc.). But playing a barre chord like that is nearly impossible. Lower it to the middle to make them as easy as possible.
Remember to keep at it! Everyone struggles with barre chords. You’re not alone. Once you get it, nothing can stop you.
JamPlay is home to more than 500,000 guitarists with guitar lessons from world class instructor artists in every genre and for every interest to power up your guitar skill. Join at JamPlay.com.
Related Posts
Comments
Create Your Practice Space: Musical Environment Matters
JP BLOG
Share this
When we think about music, we think sound. But what plays the sound? The instrument. And what plays the instrument? The musician. But what plays the musician? The space.
To transform a space into a place is to combine the physical with meaning, and then experience and interact with that meaning. This might sound a bit too “out” but remember, music is just vibrations in the air translated into electrical signals in the brain.
The mindful musician can create a place and harness its effects and use them the same way a guitarist uses a pedal board, or an organ player uses their stops. For performing musicians this is a must-have ability, and for practicing or private musicians it is just as vital.
Your practice space can either help or harm you on your path to building a relationship with your instrument and your music. To help you on your way, I want to share a few thoughts I’ve had over the years while trying to transform spaces into places.
On Bedrooms
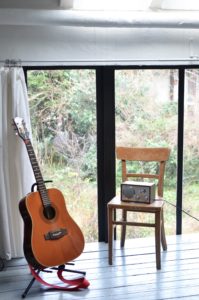
Virtually everyone starts out practicing in their bedroom. It makes sense. Your bedroom is your most personal, inner sanctum. It’s where you keep your things and it’s where you keep yourself.
Likewise you are surrounded by distractions, i.e. the things in your life that aren’t music. Your bedroom is already a place, you’re just adding music to it. Now this isn’t the end of the world, provided you can discipline yourself and keep the distractions at bay while you practice.
Get rid of your phone. Turn it off. Put it in another room. Bury it in your backyard. I don’t care, just get rid of it. If you use your laptop to practice (as I do), don’t fall down a Youtube rabbit hole watching music theory videos and band documentaries. Those videos are great for getting inspired but if they’re cutting into your practice time or serving as sources of procrastination, cut them out. You’d be better served spending quality time with a metronome and practicing the songs and concepts you’re trying to master.
TL;DR discipline is key if you’re practicing in your bedroom.
On Basements/Garages
These two spaces share a lot in common. They’re both separated from the normal functions of a house. They’re both quintessential “hobby-zones.” They’re both where people go to work on their passions.
Just about every band in the last 50 years got their start in a basement or a garage. There are whole genres and albums built around that aesthetic (@ The Basement Tapes). I distinctly remember being 16 years old, just starting out on bass, playing awful covers of Nirvana and Radiohead in my friend’s dark, unfinished basement.
It was glorious.
But what basements and garages lack in distraction they make up for in their atmosphere. Unless you’re really into grunge or doom metal (and hey, all power to you) a cave-like, serial killer atmosphere probably isn’t the greatest place for your creativity to thrive.
But this really has to do with your mindset as a practicing musician. Are you going to the basement/garage to work, or to play? If you’re treating these spaces as a place of “responsibility escape,” you’ll have a great time; but you’ll also be taking away responsibility for your music, so be mindful.
On The Band Room
For you lucky souls that have had the opportunity to dedicate four walls or more to music, I salute you. There is no space more hallowed in the world of music than the band room
It can be as large as a concert hall and it can be a glorified closet. It can be a cramped attic loft and it can be an unused classroom. It can be an outdoor amphitheater and it can be a street corner. As long as it belongs to the music while you’re there, it’s the band room
Unless you’re a weird hermit-monk (you know who you are and I’m looking at you), you’re going to make most of your progress as a musician with other musicians. So having a proper place for your band to practice and be comfortable practicing in, is crucial to becoming a better player and a better band.
 Use common sense, or don’t, whatever works for you. If you’re playing metal, put some Iron Maiden posters up. If you’re playing psychedelic rock, put up a tie-dye tapestry and some cool lights (cool lights are a necessity, more important than amplifiers and talent combined). If you’re playing jazz, put up a Jackson Pollock painting and pretend like you know what you’re doing.
On Your Mind
The saddest fact of life is that no place is permanent. If you’re a touring musician you’ll be practicing in planes, trains, and automobiles. If you’re a student you’ll be practicing in deserted dorm hallways and study lounges. If you’re a human being you’ll be practicing in spaces you might have never expected to find yourself in.
The goal of turning a practice space into a practice place is to encourage an inner state of comfort and discipline, of freedom and direction, that you can carry around with you. That place in your head can be an imagined location, a mantra, or the memory of a feeling that you keep bottled up inside your mind like water from a sacred river. The point is if you have that place within you at all times, you’ll always be able to practice diligently and deliberately. When James Hetfield worked in a factory in L.A., he practiced out in his car on his lunch breaks. During shows, John Coltrane would go play his saxophone in the bathroom in between sets. Where were they practicing?
You who drum constantly on your school desk, who play scales on your guitar in bed while you’re falling asleep, who practice slapping and popping motions for bass on every surface imaginable, you are accessing a practice place more real and more integral to your musicianship than any physical location on earth. You’re accessing yourself.
JamPlay is home to more than 500,000 guitarists with guitar lessons from world class instructor artists in every genre and for every interest to power up your guitar skill. Join at JamPlay.com.
Related Posts
Comments
Play Outside of the Box With Open Tunings
JP BLOG
Share this
Standard tuning is, well, standard. It provides incredible versatility and simplicity, but if it is the only tuning you use it can quickly start to get boring.
Luckily, you don’t have to be boxed in by standard tuning. There is a nearly infinite combination of open tunings that will enhance your creativity while providing new challenges (but not too many) that will keep you entertained– especially after a long winter of working in the same tuning.
Open Tunings 101
Here is everything you need to know to start learning open tunings.
To be able to play in an open tuning, you first need to understand what one is. Essentially, an open tuning is when you tune your guitar in a way that forms a full chord without pressing any of the strings. For example, in open D tuning (D, A, D, F#, A, D) just s trumming your guitar makes a D chord.
Open tunings are traditionally used in blues and folk music, especially when playing slide
guitar. But these beautiful tunings aren’t limited to those uses. Legendary artists like Joni Mitchell, Led Zeppelin, and many more regularly incorporated open tunings in their music, and so can you.
There is a clear downside to open tunings: they will significantly shorten the lifespan of your strings. It depends on how frequently you change tunings, but if you don’t want to be constantly changing strings I suggest staying in your preferred open tuning for an extended amount of time. If you are constantly switching back-and-forth between tunings, you will have to invest more money than you would probably like to in strings.
Check out this free intro lesson on open tunings from Yvette Young.
Relearning Chords
Obviously, if the tuning is different, so are chord shapes. You will have to invest time into relearning. Although chord variations will definitely take time and dedication to remember, the beginner chords are normally fairly easy to pick up, as you just need to barre the correct fret.
Take open D for example, playing the guitar open is a D chord. After D is E, so if you barre the second fret, you are now playing an E major. After E is F, so move that barre to the 3rd fret to play an F major.
F is followed by G, meaning barring the 5th fret will be a G major. Reset, now we are at A, and all you have to do is move to the 7th fret. So on, and so forth. This applies to every open tuning! Just start at whatever chord is open, and move through it as I did in the above example. It’s a great place to start and will make playing variations much easier.
Slide
As I mentioned earlier, slide guitar is what open tunings are traditionally used for. It makes playing simple chords much easier with the slide, as changing chords is as easy as sliding your finger up and down the guitar.
Though slide is mostly used in blues music, it can be incorporated into any genre of music. But before you get started on that creative journey, starting with blues style slide guitar is the easiest way to build a foundation that you can build off of.
JamPlay has an amazing free blues slide lesson, that is the perfect place for all guitar players to start!
So, what are you waiting for? Get that guitar in an open tuning and enjoy!
JamPlay is home to more than 500,000 guitarists with guitar lessons from world class instructor artists in every genre and for every interest to power up your guitar skill. Join at JamPlay.com.
Related Posts
Comments
Bends, Slides & Hammer Ons
JP BLOG
Share this
After a long stretch working on your guitar skills, you finally feel like you are starting to understand the guitar. But the guitar isn’t like riding a bike– if you get away from plucking those six strings, you will lose those months of hard work.
You have to be especially careful of this with bends, slides, and hammer ons. These are advanced concepts, so they’ll be the first to go if you let your foot off the gas. No need to fret– this simple guide will teach you everything you need to know.

Understanding Scales and Arpeggios
If you are fairly new to the world of bends, slides, hammer ons this is the place you want to start. A thorough understanding of scales and arpeggios is crucial.
If you don’t know already (or are only vaguely familiar) a scale is just an organized sequence of notes that help guitarists create riffs, solos, and chord progressions.
You’ve probably heard of some of the basic ones, like the Minor Pentatonic scale. An arpeggio is similar to a scale, except it breaks a chord into individual notes. For example, a C Major chord is made up of the notes C, G, E. To play a C Major arpeggio, play C, G, E, C in that order.
Groupings are also a crucial concept to grasp. Let JamPlay instructor Lance Ruby show you how in this free lesson, Getting It Under Our Fingers.
Riffing
Now that you have a solid understanding of scales and arpeggios, you are ready to start riffing. Speaking from personal experience, riffing is one of the most fun and rewarding parts of playing guitar, no matter what genre of music you prefer.
But just because you understand what makes up a riff doesn’t mean you will be able to just lay a killer one down. It takes more than just notes, you also need to have supreme timing, speed, and finger dexterity to nail it.
Lucky for you, I have some tips to have slaying riffs in no time.
Only experienced guitarists can improv successfully, so take time to plan out what you want your riff to sound like. I know the silence can be daunting, but don’t be afraid it’s a part of the creative process.
Also, don’t be afraid to use riffs from your favorite songs as inspiration. Your first few riffs aren’t going to make it out of your bedroom (or wherever you’re practicing) anyway. And, though it may not feel entirely satisfying, it’s the perfect place to start. You will be working on timing, speed, and finger dexterity while forming your own unique sound.
JamPlay has a great free video lesson, Interpretation, that will show you exactly how to make an existing piece of music your own.
My Finger’s Hurt, Help!
Here is your warning, all of this practice will hurt your fingers; It’s a part of playing guitar. Of course, your fingers will get used to heavy playing,
but no one enjoys burning, aching fingers. So, here is how to avoid as much pain as possible.
The easiest way to avoid finger pain is to keep your nails short. This is actually a double whammy as it will decrease pain and increase accuracy because your fingernails will no longer be getting in the way. Scheduling breaks while you play is another great way to keep your fingers from hurting too much. This will give you time to plan out your next riff. Lastly, ease up on the guitar strings a little bit. Pressure is required, but you shouldn’t be pressing so hard that your fingers turn white. Following these steps should have you well on your way to making the most of spring and mastering yet another guitar concept.
JamPlay is home to more than 500,000 guitarists with guitar lessons from world class instructor artists in every genre and for every interest to power up your guitar skill. Join at JamPlay.com.


